twoColumn twoRight handbook
Additional Formatting
Headings
A heading is a piece of content designed to create sections on your page. Your heading level 1 is tied to the Title of your page. It should be the only heading level 1 on the page. The Basic Heading tier in the advanced layout will be a heading level 2. You can also create heading levels 2-5 in the text editor by highlighting your text and selecting Formats > Headings and choosing the heading level needed.
Below are examples of what heading levels 2-5 look like on the page.
Heading 2
Heading 3
Heading 4
Heading 5
 |
In order to remain ADA compliant, headers must go in order on the page, you cannot skip a heading level unless you are going back up from a lower level (i.e. you cannot go from heading level 2 to heading level 4, but you can go from heading level 4 to heading level 2). |
There are also special versions of headings that can be selected through the custom formatting option in the WYSIWYG editor. Below are the examples of special headings on a white background.
Heading 2 - headingGray
Heading 2 - Reverse Blue
Heading 2 - Reverse Gray
Heading 2 - Reverse Cyan
Heading 3 - headingGray
Heading 4 - headingGray
Heading 5 - headingGray
Titles and Notifications
Titles and notifications are a way to resize and recolor text that isn't meant to be a heading. This can be accomplished by highlighting your text and selecting Formats > Custom > and choosing the title or notification level needed. Titles and notifications should be used infrequently and never as a stand alone heading. Examples of what titles and notificaitons look like are below.
Title 1
Title 2
Title 3
Notification 1
Notification 2
Quotes
Quotes are similar to titles and notifications in that they change the size and color of the text, however what separates them is that quotes are also in italic. Quotes are selcted by highlighting your text and selecting Formats > Custom > Quotes. Like titles and notifications, quotes should be used infrequently and never as a heading. Quotes can be utilized to call attention to a particular phrase within a passage, or to pull out a significant quote in a section of your page content. Below is an example of what a quote looks like.
Quote
Horizontal Rule
- To insert a horizontal rule, select Insert and then Horizontal line.
- Click the line to add a style to it, then select Formats and Custom.
Color options:
line-break-white (creates a white line like the ones above)
List with No Bullets
To create a list without bullets:
- At the top of the page click the Bullet List menu option in the WYSIWYG editor.

- Add each item.
- Highlight the full list and select Formats > Custom > noBullets.

- Your list should end up looking like the list below.
- item one
- item two
- item three
- item four
Responsive Images
On the Insert/edit image pop-up an option for responsiveImage will appear in your Styling box. If you select this image you will ensure that your non-banner images will not appear cutoff on smaller devices.
Note: In most cases images do not need to be more than 400px wide, but if they do, this option for responsive images should always be selected when adding an image in the WYSIWYG editor.
Rate Calculators
Within Cascade we have the ability to create simple rate calculators. These calculators can be used to estimate things like tuition rates, gpa needs and more. An example of the calculator functionality can be seen below.
Calculator
Contact webmaster@unf.edu to have the calculator page type added to your folder.
Building the Calculator
- First, navigate to your blocks or setup folder. Next, select + Add Content > Page like you would to build a regular page. Finally, from the drop down select Calculator as your page type.
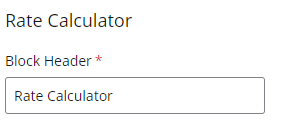
- After selecting Calculator as your page type, start by giving your calculator a block header.
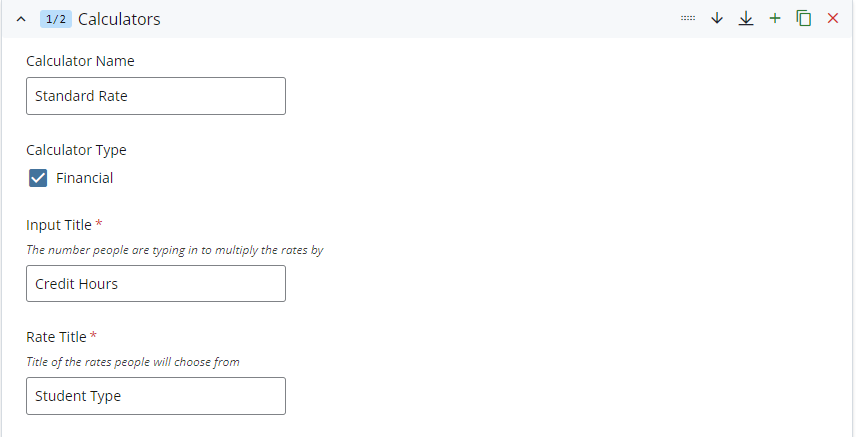
- Next design your calculator by filling out the following fields (you can create multiple calculators in one file if needed).
- Calculator Name (if you have multiple calculators this will differentiate them on the page)
- Calculator Type (the Financial option will add a dollar sign to the answer)
- Input Title (this is the title of the number users will input to be multiplied by the rate)
- Rate Title
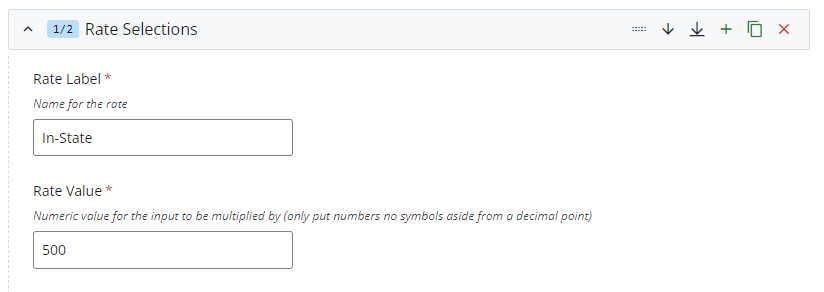
- After designing your calculator, add the rates for the calculator by giving them each a Rate Label and a Rate Value (numeric value the input will be multiplied by). You can create as many rates as you need.
- After designing your calculator(s), submit the feed. Then click on the Output option in the top right of the Cascade editor and select preview to display the calculator.

- After reviewing and ensuring the calculator looks correct and functions properly, publish your calculator feed.
Placing the Calculator on a Page
- Edit the page you would like your calculator to appear on.
- Type the word Calculator wherever you would like the calculator to appear on your page.
- Highlight the word Calculator and click the link icon to add a link. Internally select your calculator feed from the link selector (more instructions on how to build links can be found on the links page of the Cascade manual). Finally, in the styling box, choose calculator-container from the options available.
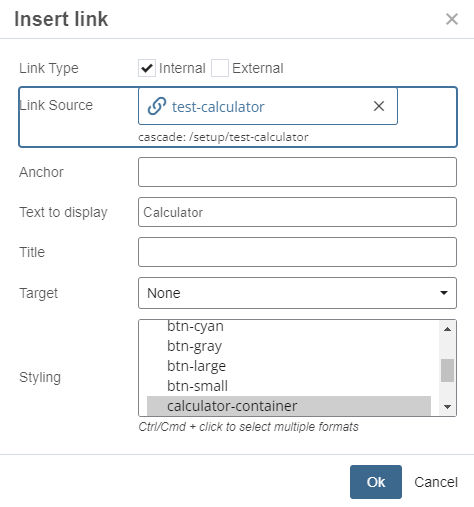
- Select Ok and your link will appear.
- Here is what the link will look like on the code side after selecting the <> code button.

- After you have completed these steps, submit your page and the calculator will automatically be built onto your page where you have placed this link. Publish your page if you are ready for the calculator to be live on your site.
Editing the Calculator
After you have attached your calculator to the page, all you will need to do to change the calculator is edit the original calculator feed file and republish the feed. This will ensure everywhere you have attached the calculator will automatically receive the updates.
